LED area lights are versatile workhorses for outdoor illumination, but their performance hinges on one often-overlooked factor: mounting method. The right mounting option aligns with your space layout, mounting height needs, and lighting objectives—whether you’re illuminating a parking lot, industrial yard, or residential backyard. With a range of setups available (from pole mounts to ceiling brackets), choosing the best fit can feel overwhelming. In this guide, we’ll break down all common mounting options for LED area lights, their pros and cons, ideal applications, and key considerations to help you make an informed decision.
Why Mounting Option Matters for LED Area Lights
Before diving into specific mounts, let’s clarify why this choice is critical:
- Coverage & Direction: Mounting height and position dictate how light spreads—e.g., a pole mount lifts fixtures high for wide coverage, while a wall mount targets specific areas.
- Safety & Accessibility: Proper mounting ensures fixtures are secure (especially in high-wind areas) and accessible for maintenance.
- Compliance: Local codes may restrict mounting heights or positions (e.g., no ground mounts in public walkways), making the right choice a regulatory necessity.
- Aesthetics: For residential or retail spaces, mounting options like recessed ceiling brackets blend with surroundings, while pole mounts make a bold statement in industrial zones.
Common Mounting Options for LED Area Lights
Below is a detailed breakdown of the most popular mounting setups, including their design, best uses, and key features:
1. Pole Mount (Most Popular for Large Spaces)
Pole mounting is the gold standard for LED area lights in commercial, industrial, and large residential spaces. It involves attaching the fixture to a dedicated pole (metal, wood, or concrete) at varying heights.
Key Details:
- Design: Fixtures attach via a mounting bracket (slip-fit, fixed, or adjustable) that secures to the top or side of the pole. Poles range from 10–40+ feet tall (custom heights available for industrial use).
- Pros:
- Maximizes coverage (high mounting height = wide light spread).
- Flexible positioning (poles can be placed anywhere with a concrete base).
- Ideal for uniform illumination of large areas (parking lots, industrial yards).
- Cons:
- Requires concrete footing installation (adds cost and labor).
- Poles may be restricted in residential areas (check local zoning laws).
- Ideal Applications:
- Commercial parking lots, sports courts, school campuses, industrial complexes, large backyards.
- Recommended For: Spaces needing 1,000+ sq. ft. coverage, uniform brightness, or high mounting heights (20+ feet).
Pro Tip: Choose a slip-fit mount for easy angle adjustment (critical for directing light away from neighboring properties) or a fixed mount for permanent, wind-resistant stability.
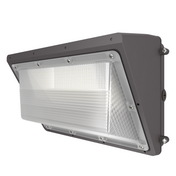
2. Wall Mount (Best for Targeted Illumination)
Wall mounting attaches LED area lights directly to exterior walls, making it a space-saving option for targeted or supplementary lighting.
Key Details:
- Design: Fixtures use a wall bracket (surface-mount or recessed) that screws into the wall. Most brackets are adjustable (0°–180°) to direct light upward, downward, or outward.
- Pros:
- No additional pole or footing required (cost-effective).
- Saves space (ideal for narrow areas like alleys or building exteriors).
- Reduces glare (fixtures can be angled downward toward the ground).
- Cons:
- Limited coverage (mounted lower than poles, typically 8–15 feet).
- Dependent on wall structure (requires sturdy masonry or metal walls—avoid drywall).
- Ideal Applications:
- Storefronts, entryways, loading docks, residential garages, alleyways, patio covers.
- Recommended For: Small-to-medium spaces (500–1,000 sq. ft.), targeted lighting (e.g., driveways), or areas with existing wall structures.
Pro Tip: For coastal or humid environments, choose a corrosion-resistant bracket (stainless steel or powder-coated aluminum) to prevent rust.
3. Ceiling/Ceiling Mount (Space-Saving for Covered Areas)
Ceiling mounting is designed for covered outdoor spaces (eaves, awnings, parking garages) where fixtures need to be out of sight but still deliver focused light.
Key Details:
- Design: Fixtures attach to ceiling surfaces via a flush mount (low-profile) or pendant mount (hanging). Ideal for mounting heights of 8–15 feet.
- Pros:
- Conceals wiring (clean, professional look).
- Protects fixtures from direct rain/snow (extends lifespan).
- Reduces glare (light is directed downward from a covered position).
- Cons:
- Limited to covered spaces (not for open-air areas).
- Coverage is restricted to the area directly below the ceiling.
- Ideal Applications:
- Parking garage ceilings, porch eaves, restaurant patios (with awnings), warehouse loading docks (covered), entryway overhangs.
- Recommended For: Covered commercial/residential spaces, low mounting heights, or areas where aesthetics are a priority.
Pro Tip: Use a pendant mount for adjustable height (e.g., lowering the fixture over a patio) or a flush mount for tight spaces (e.g., low garage ceilings).
4. Ground Mount (Temporary or Remote Spaces)
Ground mounting secures LED area lights to the ground via a stake, base plate, or portable stand—making it a flexible option for temporary or remote areas.
Key Details:
- Design: Options include:
- Stake Mount: Metal stake inserts into the ground (ideal for soft soil, 6–10 inches deep).
- Base Plate Mount: Heavy-duty metal plate with anchor bolts (secures to concrete or asphalt).
- Portable Stand: Wheeled or foldable stand (for temporary use like construction sites).
- Pros:
- No permanent installation (perfect for temporary projects or rentals).
- Easy to relocate (adjust fixture position as needed).
- No wall or pole required (ideal for remote areas like trails or construction zones).
- Cons:
- Low mounting height (6–10 feet) = limited coverage.
- Less stable in high winds (use anchor bolts for permanent ground mounts).
- May be a tripping hazard in pedestrian areas.
- Ideal Applications:
- Construction sites, temporary event spaces (fairs, concerts), backyard trails, remote industrial yards (no existing structures), emergency lighting.
- Recommended For: Temporary use, remote spaces, or areas where permanent installation is not feasible.
Pro Tip: For permanent ground mounting, use a base plate with concrete anchors to prevent shifting; for temporary use, choose a portable stand with weighted feet for stability.
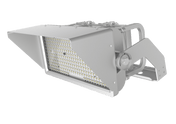
5. Yoke Mount (Versatile for Poles/Walls)
Yoke mounting is a hybrid option that uses a U-shaped bracket (yoke) to attach fixtures to poles, walls, or ceilings—offering maximum adjustability.
Key Details:
- Design: The yoke bracket clamps to poles (1–4 inches in diameter) or screws into walls/ceilings. Fixtures can be rotated 360° and tilted 0°–90° for precise light direction.
- Pros:
- Versatile (works with poles, walls, or ceilings).
- Highly adjustable (perfect for irregularly shaped spaces).
- Easy to install (no custom brackets needed).
- Cons:
- Less stable than fixed mounts (may loosen over time in high winds—tighten bolts quarterly).
- Not suitable for extra-heavy fixtures (over 50 lbs.).
- Ideal Applications:
- Irregular spaces (L-shaped parking lots), supplementary lighting (e.g., adding a fixture to an existing pole), temporary setups.
- Recommended For: Spaces needing flexible light direction, mixed mounting surfaces, or small-to-medium fixtures (10–30 lbs.).
Pro Tip: Use a yoke mount with a locking bolt to secure the angle—critical for preventing fixture movement in windy conditions.
How to Choose the Right Mounting Option
Follow these steps to select the best mounting setup for your LED area lights:
Step 1: Assess Your Space & Coverage Needs
- Large, Open Spaces (1,000+ sq. ft.): Choose pole mounts (high height = wide coverage).
- Small, Targeted Areas (500–1,000 sq. ft.): Opt for wall mounts or ceiling mounts.
- Temporary/Remote Spaces: Ground mounts or portable yoke mounts.
- Covered Areas: Ceiling mounts (flush or pendant) for a clean look.
Step 2: Evaluate Existing Structures
- Existing Walls: Wall mounts (cost-effective, no extra installation).
- Existing Poles: Yoke mounts or pole mounts (avoid duplicate pole installation).
- Covered Ceilings: Ceiling mounts (protects fixtures from weather).
- No Existing Structures: Pole mounts (permanent) or ground mounts (temporary).
Step 3: Consider Mounting Height Requirements
- 8–15 Feet: Wall mounts, ceiling mounts, ground mounts.
- 15–25 Feet: Short pole mounts, yoke mounts on tall walls.
- 25–40+ Feet: Tall pole mounts (industrial/commercial use).
Step 4: Factor in Budget & Installation Complexity
- Low Budget: Wall mounts or ceiling mounts (no extra poles/footings).
- Mid-Range Budget: Pole mounts (concrete footing + pole cost).
- Temporary Use: Ground mounts or portable stands (no permanent installation fees).
Step 5: Check Local Codes & Restrictions
- Residential areas may limit pole height (e.g., max 15 feet) or ban ground mounts in front yards.
- Commercial zones may require wind-resistant mounts (fixed pole mounts or weighted ground bases).
- Historical districts may restrict visible mounts (opt for recessed ceiling or low-profile wall mounts).
Common Mounting Mistakes to Avoid
- Ignoring Wall/Pole Strength: Mounting a heavy fixture (30+ lbs.) on a weak wall (e.g., wood siding) or thin pole (less than 3 inches diameter) risks collapse.
- Skipping Concrete Footings: Pole mounts without a concrete base will shift in wind or soil erosion.
- Overlooking Adjustability: Choosing a fixed mount for a space that needs light direction changes (e.g., a patio that doubles as an event space) limits functionality.
- Ignoring Weather Resistance: Using indoor mounting brackets for outdoor fixtures will lead to rust and failure (always choose IP65+ rated brackets).
- Underestimating Installation Costs: Pole mounts require professional concrete work—budget for labor in addition to the fixture and pole.
Additional Tips for LED Area Light Mounting
- Choose Adjustable Brackets: Even permanent setups benefit from adjustability (e.g., seasonal light direction changes for snow-covered parking lots).
- Prioritize Weather Resistance: Look for brackets made of aluminum, stainless steel, or powder-coated steel to resist rain, salt, and rust.
- Hire a Professional: For pole mounts (concrete footings) or high wall mounts (15+ feet), professional installation ensures safety and compliance.
- Match Mount to Fixture Weight: Check the fixture’s weight capacity (listed on the spec sheet) and choose a bracket rated for 1.5x that weight (for wind load safety).
Final Thoughts
The right mounting option for your LED area light depends on your space size, existing structures, mounting height, and budget. Pole mounts excel for large, open areas; wall mounts shine for targeted lighting; ceiling mounts work for covered spaces; ground mounts suit temporary use; and yoke mounts offer versatility. By assessing your needs and avoiding common mistakes, you’ll ensure your LED area lights deliver optimal coverage, safety, and longevity.
Remember: Mounting is not an afterthought—it’s a critical part of your lighting system. Invest in quality brackets, follow local codes, and prioritize adjustability to get the most out of your LED area lights. If you’re unsure, consult a lighting professional to assess your space and recommend the best setup!